
Back again. Finally writing after my last post about some practical lifehacks. This time, I want to discuss a stack battle — the results of my small research on two popular self-hosted platform alternatives: Dokploy and Coolify.
At my workplace, we often get projects that require a combination of SPA/SSR web and a CMS — usually Strapi for the CMS and frameworks like React or Next.js for the web. However, plans are to migrate to PayloadCMS in the future to unify the service across SPA/SSR web and CMS.
So far, the setup process has been done from scratch: install Docker, set up Compose files, sometimes create Swarm clusters for development, staging, and production, then configure the network, Traefik, SSL, and database containers.
While this manual approach gives complete flexibility, I’ve gradually started to feel that there’s one thing that keeps repeating — the same basic setup in every project. From there, I became curious:
“Is there a self-hosted solution that can help speed up the deployment process without sacrificing full control over the environment?”
That’s why I tried two popular tools in this category — Dokploy and Coolify. Both offer a PaaS-like experience similar to Railway or Render, but can be self-hosted on our own servers (e.g., EC2 or VPS).
In this article, I’ll compare my real-world experience installing Dokploy and Coolify on a fresh EC2 instance, and determine whether these platforms are worth it for SPA/SSR + CMS use cases.
For this test, I used:
AWS EC2 t3.Medium
There’s one important thing I discovered during initial testing:
Make sure your VM has at least 16 GB storage.
When I first tried with an 8 GB root volume, the installation process stalled midway, especially during the App service setup phase.
Both platforms, Dokploy and Coolify, don’t just run the leading service but also include supporting components such as internal databases, a Traefik proxy, and backend services. All of this needs extra space.
After I increased the storage to 20GB, the installation process ran smoothly to completion.
Personal tip: If you plan to deploy more than one application (e.g., CMS + frontend + database), it’s safer to allocate 20 GB or more to avoid “No space left on device” errors during the image build process.
Note:
Both — Dokploy and Coolify — provide an official curl-based one-liner installer.
Let’s start with Dokploy first:
sudo su
curl -fsSL https://dokploy.com/install.sh | bash
The process is relatively fast, about 2–3 minutes on EC2 t3.medium (2 vCPU, 4GB RAM). The developers use Next.js for their dashboard.
The script will automatically:
After completion, a message like this appears in the terminal:
✅ Dokploy installation finished!
Open http://<your-ec2-ip>:3000 to access the dashboard.
By default, port 3000 hasn’t been opened in the EC2 security group, so you can’t directly access the dashboard.
You can work around this by:
First impression: Lightweight and fast, but the initial setup is less beginner-friendly.
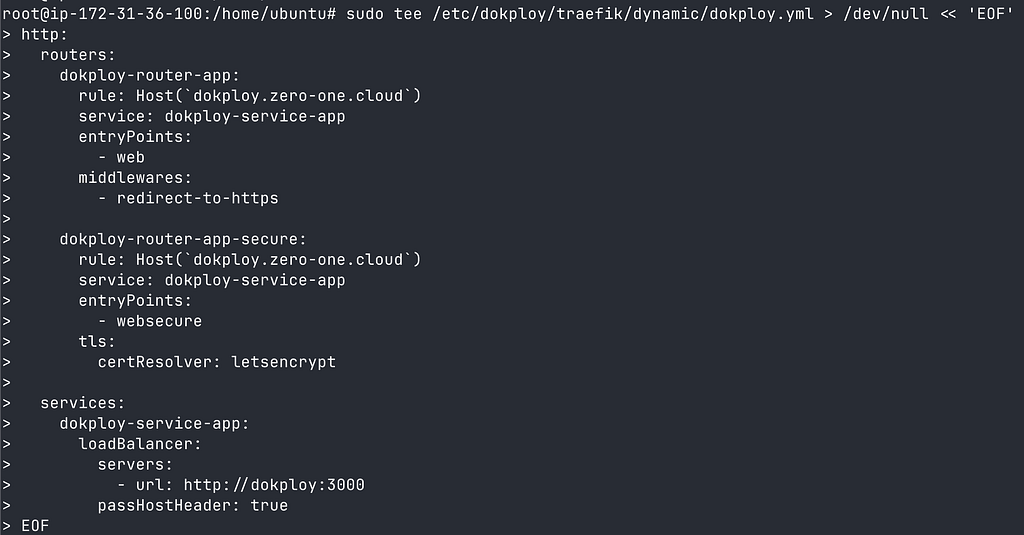
If you want Dokploy to be immediately accessible via a domain (without IP and port 3000), you can directly modify the Traefik configuration with a single tee command:
sudo tee /etc/dokploy/traefik/dynamic/dokploy.yml > /dev/null << 'EOF'
http:
  routers:
    dokploy-router-app:
      rule: Host(`dokploy.yourdomain.com`)
      service: dokploy-service-app
      entryPoints:
        - web
      middlewares:
        - redirect-to-https

    dokploy-router-app-secure:
      rule: Host(`dokploy.yourdomain.com`)
      service: dokploy-service-app
      entryPoints:
        - websecure
      tls:
        certResolver: letsencrypt

  services:
    dokploy-service-app:
      loadBalancer:
        servers:
          - url: http://dokploy:3000
        passHostHeader: true
EOF
Then restart Traefik so the new configuration is loaded:
sudo docker restart dokploy-traefik
sudo docker logs dokploy-traefik --tail 50
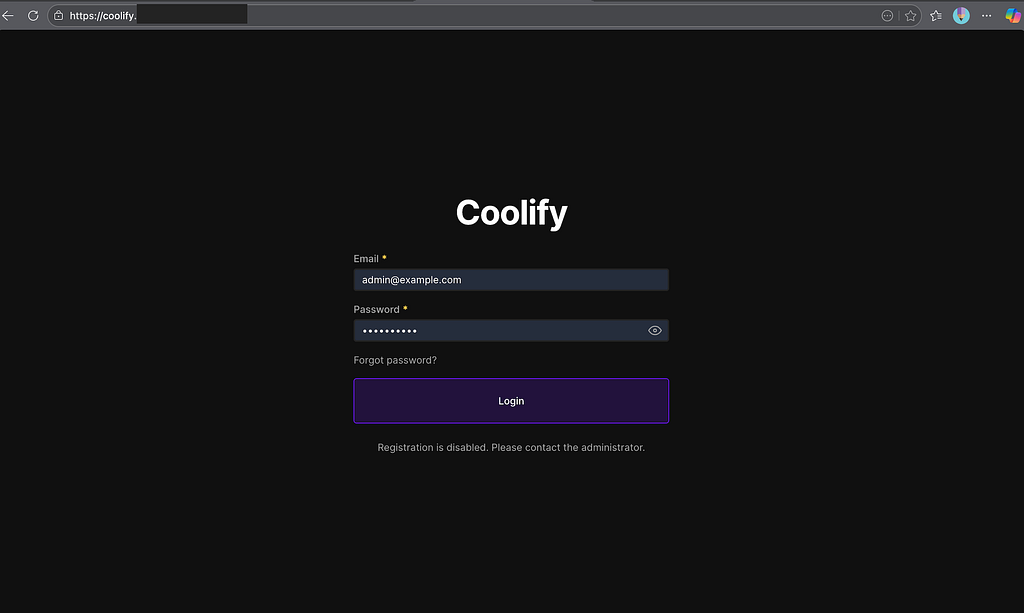
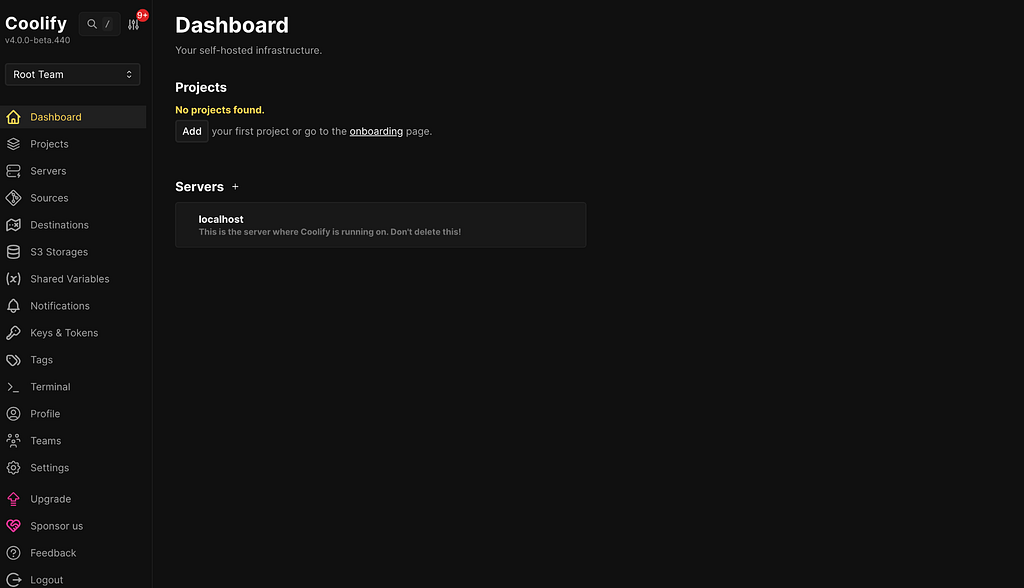
If everything goes smoothly, Dokploy can now be accessed and will redirect to the registration page for the first time. Register as usual, and after successful registration, you’ll be directed to the main dashboard:
https://dokploy.yourdomain.com/register
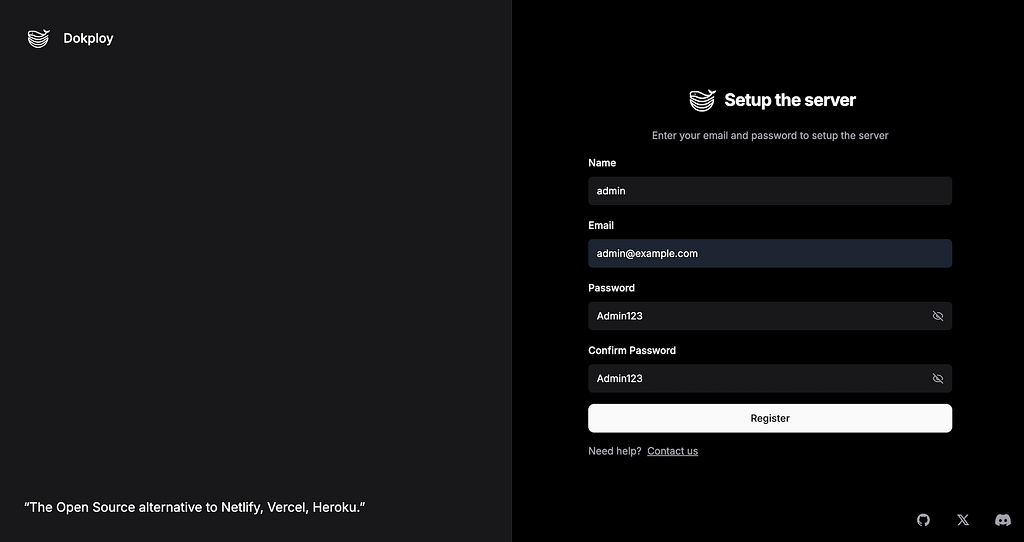
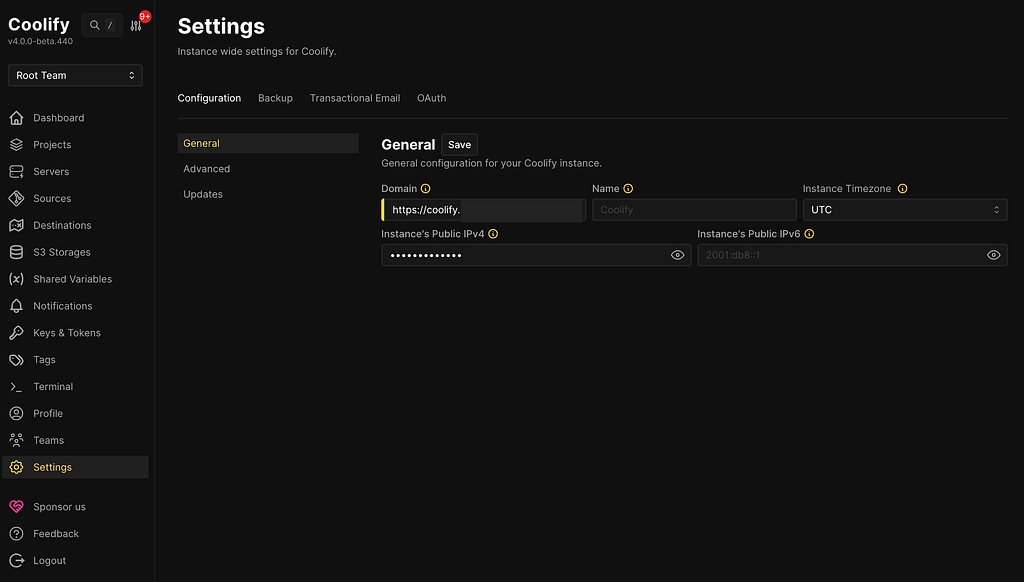
Personal tip: This is the safest and fastest method. After DNS is pointed to your EC2 IP, Dokploy immediately runs via HTTPS with automatic Let’s Encrypt certificate — no additional setup required. However, I hope there will be contributors who can add a “set domain at install time” option to make the initial setup more seamless.
The installation steps are almost identical:
curl -fsSL https://cdn.coollabs.io/coolify/install.sh | bash
The process is the same as installing Dokploy (2–3 minutes) because Coolify brings internal components (backend, proxy, DB, UI) along with other development tools like curl, wget, git, jq, and openssl. The developers use PHP for their dashboard.
After completion, the message appears:
Coolify is ready!
Open http://<your-ec2-ip>:8000 to start setup
The problem is the same — port 8000 hasn’t been opened, so the dashboard can’t be accessed yet.
You can:
Unlike Dokploy, which allows easy direct adjustment of Traefik config, Coolify is not recommended for manual config editing.
Technical reasons:
This is a deliberate design choice:
Since manual editing is not recommended, we have to use the UI. The problem: port 8000 hasn’t been opened.
Solution: SSH Tunnel
# in your local terminal
ssh -i your-key.pem -L 8000:localhost:8000 ubuntu@<EC2-IP>
Open browser: http://localhost:8000
Steps:
https://coolify.yourdomain.com
(Make sure DNS is already pointing to EC2 IP)
4. Click Save
5. Wait ~30–60 seconds
What happens:
Result:
After both platforms are successfully accessible via the domain, it’s time to test deployment with a real application: PayloadCMS — one of the popular modern headless CMS for SPA/SSR use cases. I happen to have a custom repo example here.
I’ll test 2 deployment scenarios:
Database Name: payload
Username: payload
Password: <generate-strong-password>
5. Click Create → wait for database to be ready (~30 seconds)
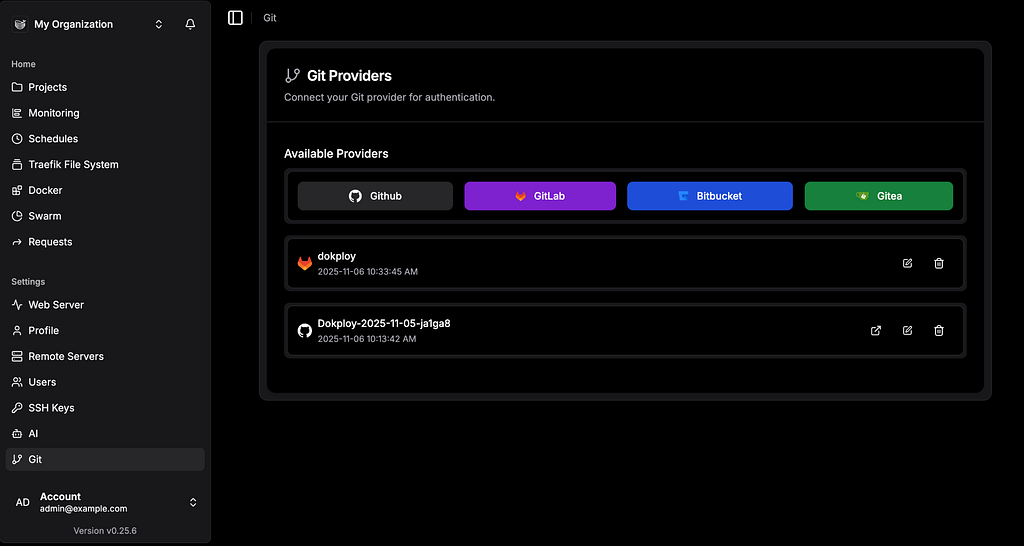
3. Select Provider → GitHub
4. Select repo: payloadcms (or your template)
5. Branch: main

6. Environment Variables:
DATABASE_URI=postgresql://payload:<password>@postgres:5432/payloaddb
PAYLOAD_SECRET=<random-string-min-32-chars>
NODE_ENV=production
7. Build Settings:
   Build Type: Dockerfile
   Dockerfile Path: ./Dockerfile (or path according to the repository)
   Port: 3000
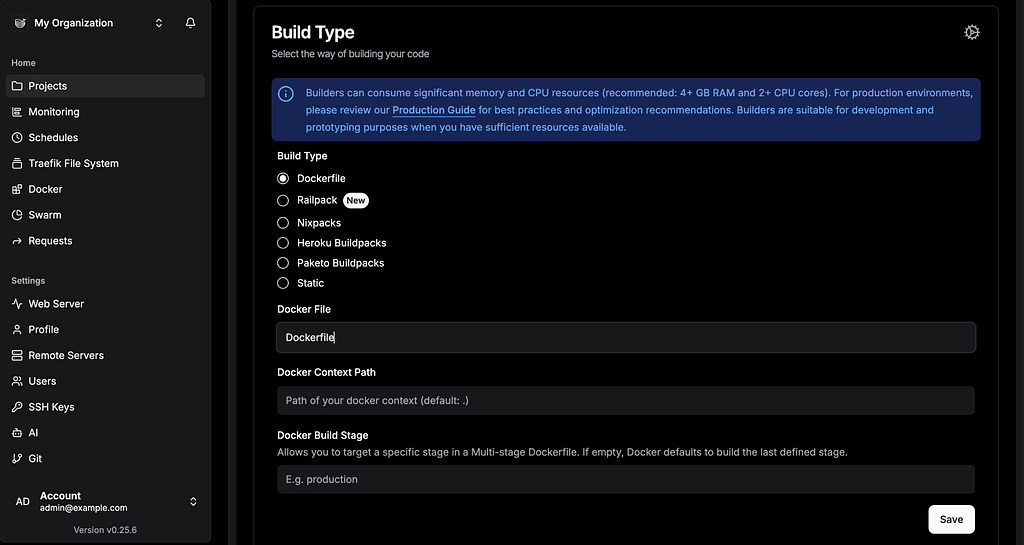
8. Click Deploy
9. Go to Domains → then change the domain as needed
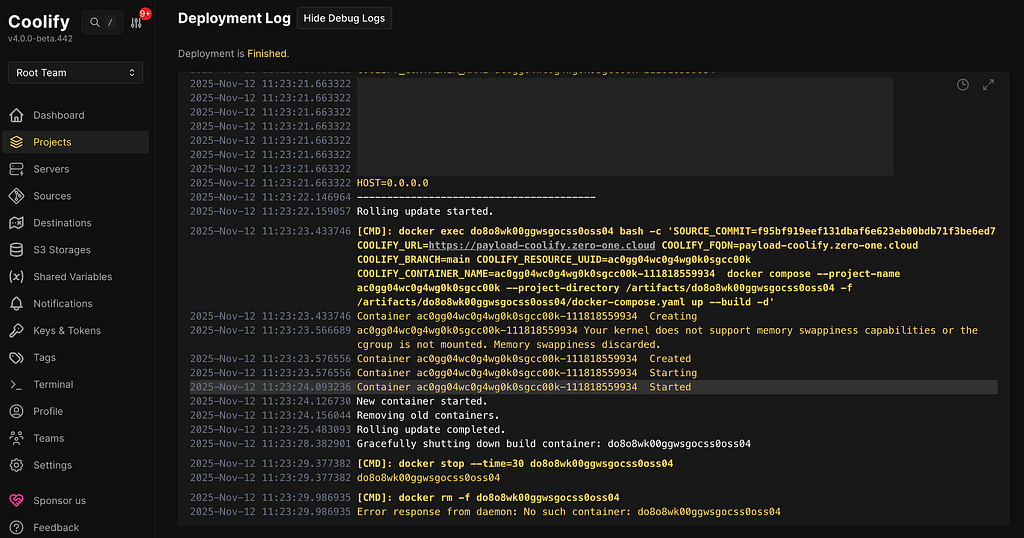
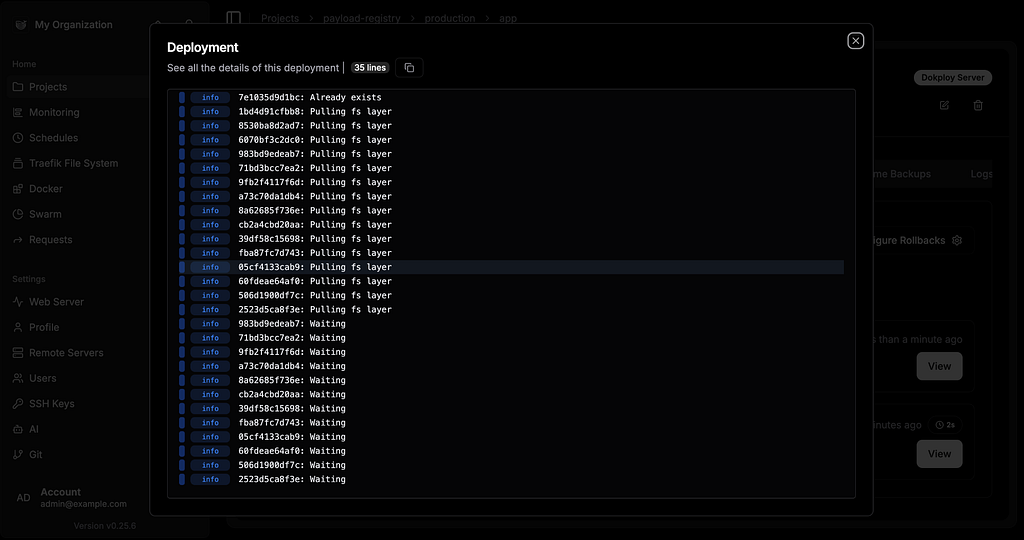
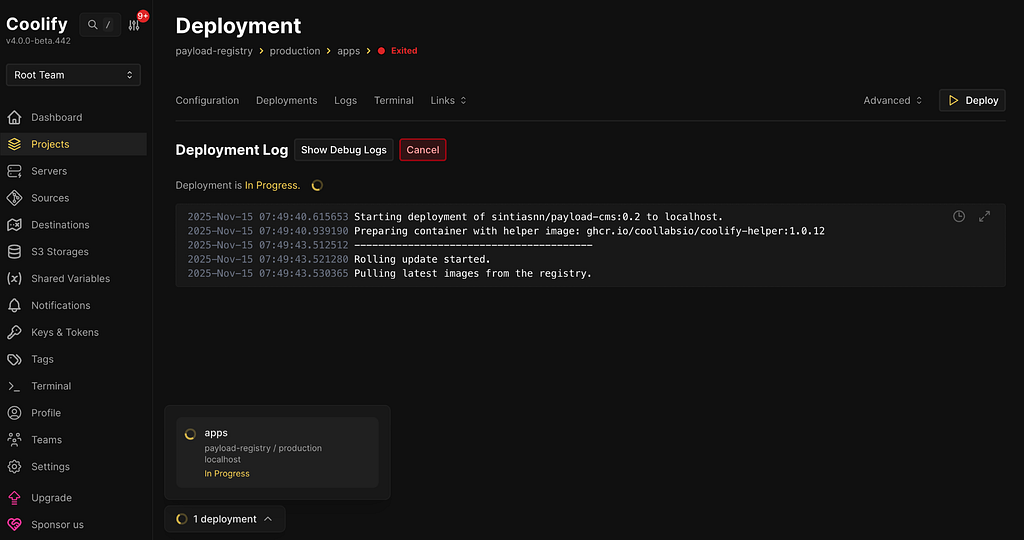
Build Process:
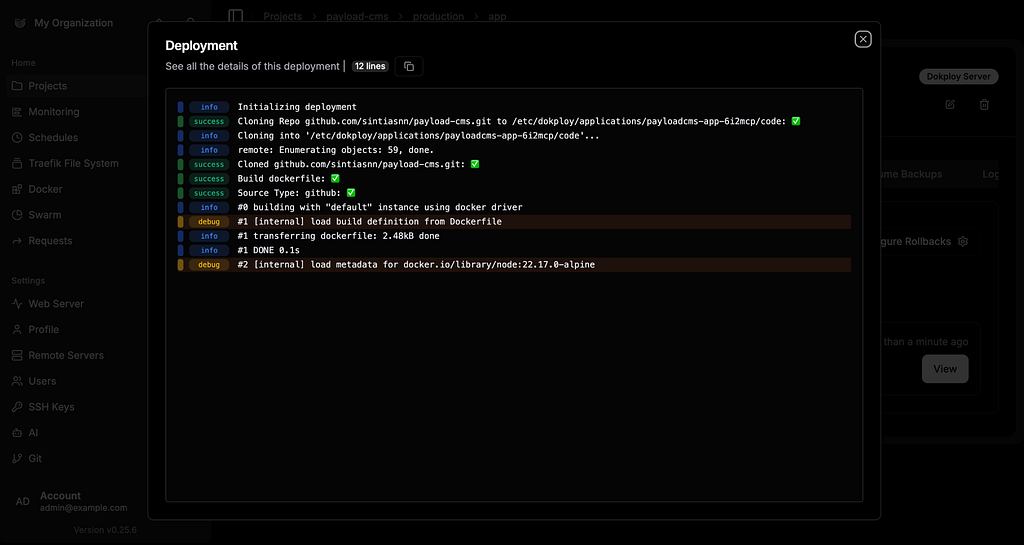
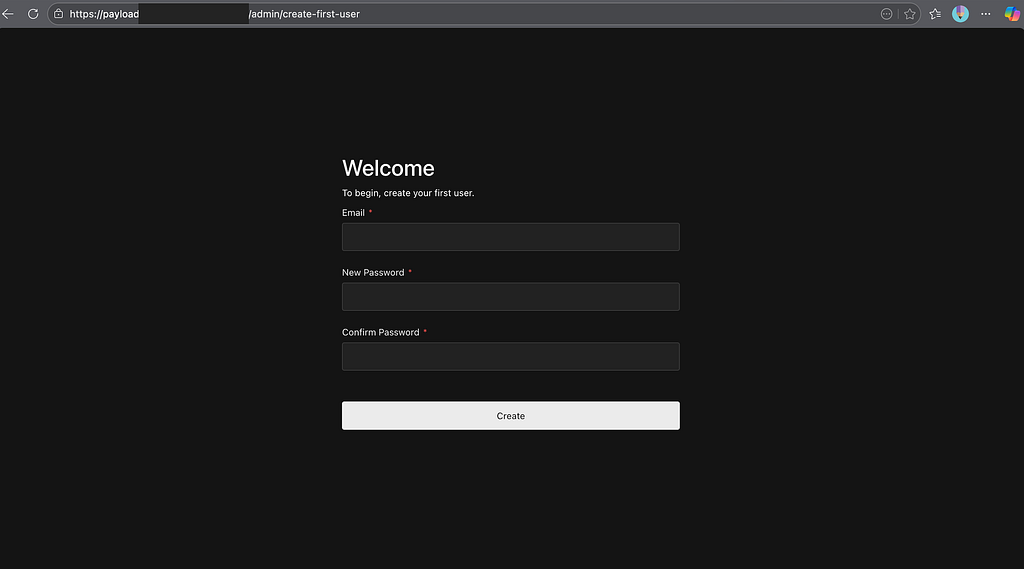
The application is now live and accessible. On first access, you’ll be redirected to the registration page before you can access the Payload dashboard.
https://payload.yourdomain.com

Resource monitoring:
# Check Dokploy resource usage
docker stats --no-stream | grep dokploy
Result:
root@ip-172-31-36-100:/home/ubuntu# docker stats --no-stream | grep dokploy
CONTAINER ID   NAME                                              CPU %     MEM USAGE / LIMIT     MEM %     NET I/O           BLOCK I/O        PIDS
7be7c038e9b9   dokploy.1.lks1r3j4jh4gftwrluk4um55g                 0.06%     443.4MiB / 3.759GiB   11.52%    21.4MB / 66MB     284MB / 1.97MB   35
900ae1360e84   dokploy-redis.1.ofslueu4i2tmtbnecx38bbv1c           0.51%     6.934MiB / 3.759GiB   0.18%     60.8MB / 16.5MB   16.2MB / 422kB   6
a20680fd1eb8   dokploy-postgres.1.sia2b3a7gasz22eqrl7sl559b        0.00%     29.34MiB / 3.759GiB   0.76%     3.13MB / 3.4MB    37.8MB / 872kB   6
4706ece5e6d8   dokploy-traefik                                     0.00%     53.69MiB / 3.759GiB   1.39%     4.85MB / 6.2MB    138MB / 0B       9
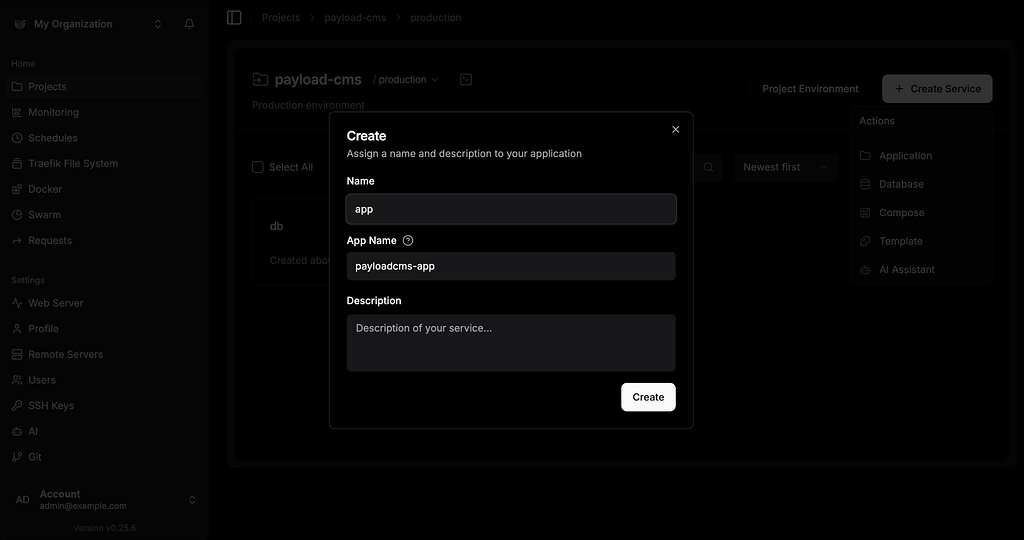
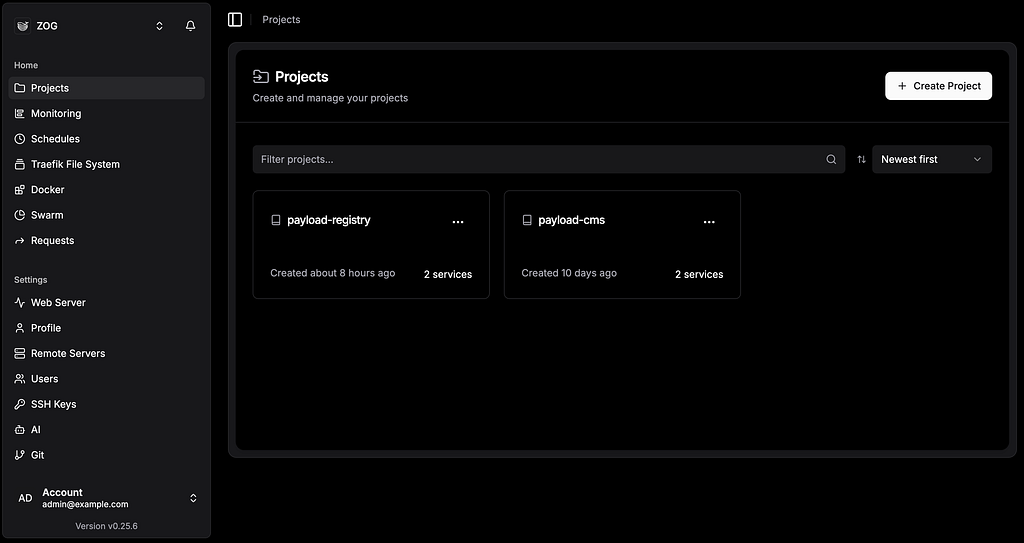
Project Setup:
Name: payload-cms
Description: PayloadCMS Deployment (optional)
3. Click Save or Continue
4. Project created → Enter project dashboard
Note: Project is a container for organizing resources (apps, databases, services)
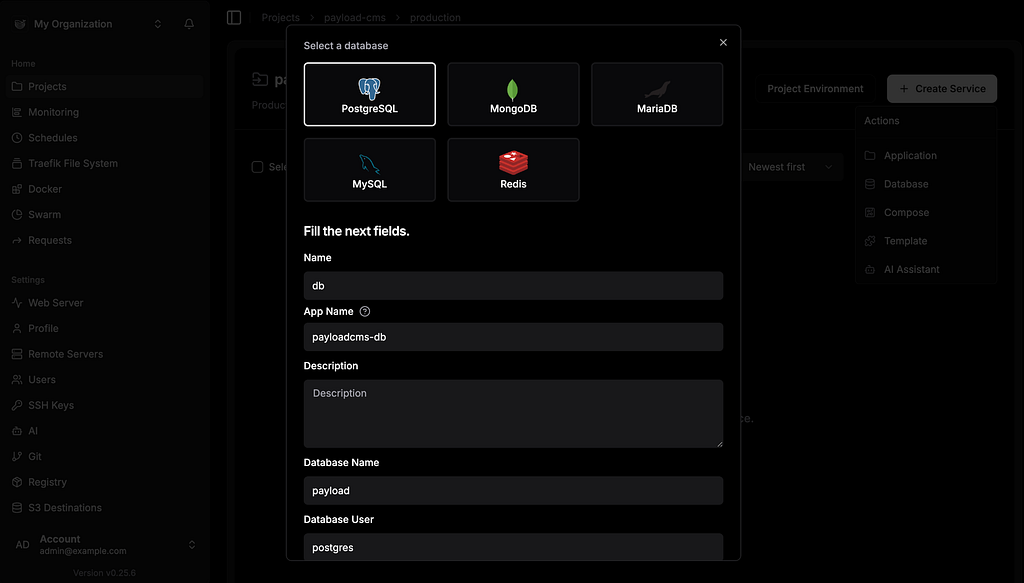
Database Setup:
Name: postgres-db
Database Name: payload
Username: payload
Password: <auto-generated orcustom>
Version: 15 (or latest)
4. (Optional) Set Destination (which server)
5. Klik Save → Start → Database provisioning (~1 minute)
6. Database ready → note the Internal Connection String
Connection String format:
postgresql://payload:<password>@payloaddb:5432/payload
6. Environment Variables:
Tab Environment → Add variables:
DATABASE_URI=postgresql://payload:<password>@payloaddb:5432/payload
PAYLOAD_SECRET=<generate-32-char-random-string>
NODE_ENV=production
Tip: Can use ${SERVICE_PASSWORD_PAYLOADDB} to auto-inject password from database
7. Domains:
8. Click Deploy
Build Process:
root@ip-172-31-34-110:/home/ubuntu# docker stats --no-stream | grep coolify
CONTAINER ID   NAME                                    CPU %     MEM USAGE / LIMIT     MEM %     NET I/O           BLOCK I/O        PIDS
2cf073d978c3   coolify-sentinel                        0.00%     12.5MiB / 3.759GiB    0.32%     34.1kB / 538kB    39.2MB / 0B       8
2846e93a8b06   coolify                                 0.68%     326.1MiB / 3.759GiB   8.47%     2.77GB / 4.47GB   144MB / 120MB     28
a332b2e66451   coolify-realtime                        1.07%     66.5MiB / 3.759GiB    1.73%     1.39MB / 250MB    46MB / 4.1kB      21
e7cf7a4c842e   coolify-redis                           5.48%     9.512MiB / 3.759GiB   0.25%     3.99GB / 1.16GB   14.3MB / 36.2GB   7
dd1362060e2f   coolify-db                              0.00%     32.8MiB / 3.759GiB    0.85%     622MB / 940MB     39.3MB / 421MB    7
e2e211e2c604   coolify-proxy                           0.14%     54.68MiB / 3.759GiB   1.42%     610MB / 281MB     179MB / 41kB      9
As in scenario 1, prior to starting the app setup, you need to prepare the project and database—this process remains unchanged. Once completed, you can proceed to the app setup.
Pull Process:
Important! Dokploy uses a single shared overlay network for all services. This makes inter-service communication simpler, but it comes at the cost of network isolation.
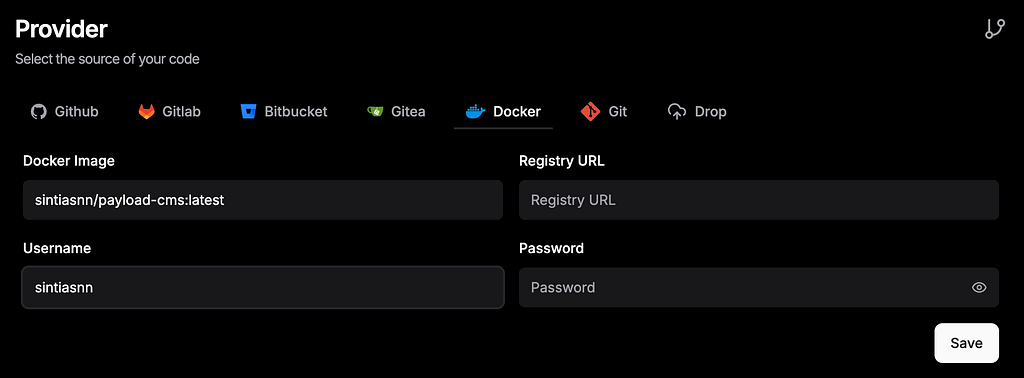
Note: If the image you’re using is private or uses another registry, don’t forget to fill in username, password, and Registry URL for authentication.
Similar to scenario 1, before starting the app setup, we need to prepare the project and database. The process is the same as previously. Afterward, we can proceed to the app setup.
Environment Variables:
Tab Environment → Add variables:
DATABASE_URI=postgresql://payload:<password>@payloaddb:5432/payload
PAYLOAD_SECRET=<generate-32-char-random-string>
NODE_ENV=production
6. Domains:
7. Click Deploy
Pull Process:
Update proses:
Update proses:
First impression:

First impression:
Self-hosted deployment platforms like Dokploy and Coolify are indeed game changers. But let’s be honest about one thing:
The resource overhead is not small.
Sweet spot: 2–5 small-scale applications like PayloadCMS, Next.js sites, APIs.
Reality: For “saving resources,” neither is ideal yet. The dashboard alone needs 2–4GB of RAM.
For small-scale applications like PayloadCMS? Worth it if you have 2+ apps. But don’t expect “resource savings” — this is about saving setup time. Neither is bad. It comes back to your needs.
Happy experimenting! Have you tried Dokploy or Coolify yet? Drop your experience in the comments — I’d love to know which one worked better for your use case. Thanks for reading!
<hr><p>Dokploy vs Coolify: Real-World Comparison on a Fresh EC2 Instance was originally published in Zero One Group on Medium, where people are continuing the conversation by highlighting and responding to this story.</p>